Communicate & Follow Up With Leads
This article will show you how Lives2Leads can help you communicate with your leads… on auto-pilot!
Step 1: Create / Modify Your Email Templates
Go to ‘Settings’

From the sidebar menu select ‘Email Templates’.
Here you can edit an existing template or click the “+ EMAIL TEMPLATE” button to create a new template.

Give your Email Template a name and Subject line.
Then add the content of your email.
PRO TIP: Use the “Placeholders” to merge personalized data into your emails automatically! For example, using the {{ lead.firstName }} placeholder will automatically place the first name of your lead into the email without you having to manually enter it for each email you send. You can find a full list of available placeholders at the bottom of the ‘Editing Email Template’ screen.

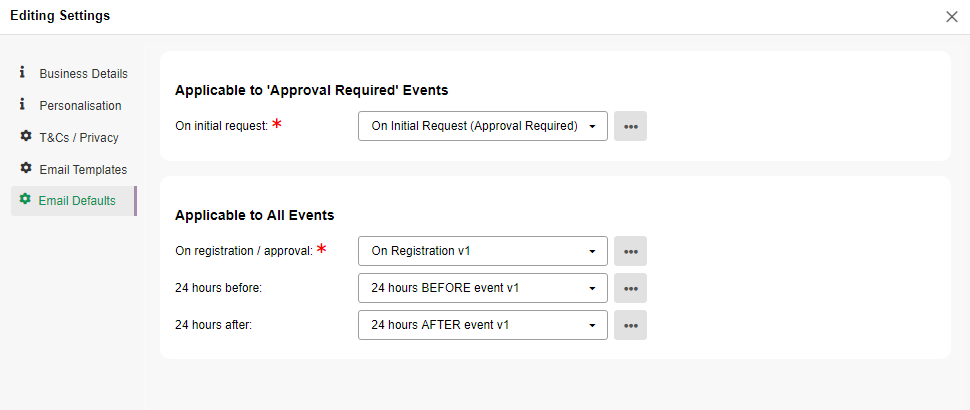
Step 2: Set your Email Defaults
Still in the ‘Settings’ section, select the ‘Email Defaults’ option in the left sidebar menu.
For each type of email, you can now select a default Email Template to use for each scenario. These can be overridden for each individual Live event you create (more on that below), but these options will be selected by default when you create a new event.
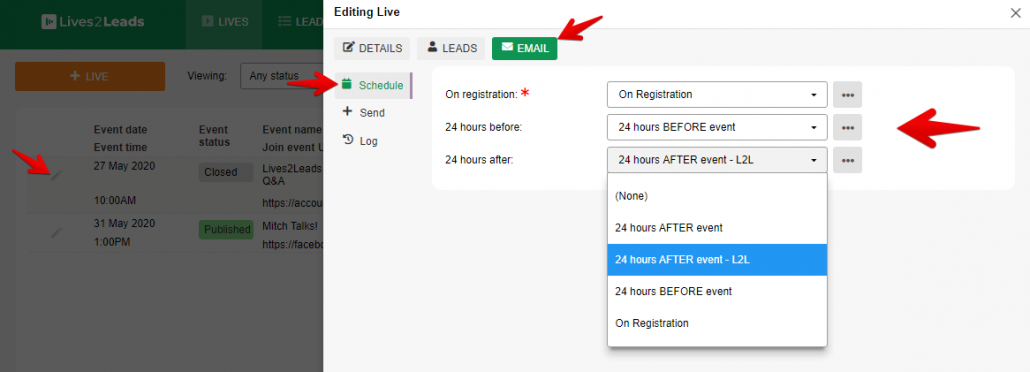
Step 3: Adjust your email schedule for an individual event
As mentioned above, you can select a custom email schedule for any individual Live event. Here’s how…
Open the Event Editor for the event you’d like to modify.
Select the “EMAIL” tab at the top.
Select the “Schedule” option in the left sidebar menu.
Using the dropdown lists, select the Email Template you’d like to use for each part of the schedule.
Step 4: Send Non-Scheduled Emails to Leads
You can also manually trigger emails to be sent to all of your leads for a particular event.
Again, open the Event Editor for the event you’d like to modify.
Select the “EMAIL” tab at the top.
Select the “Send” option in the left sidebar menu.
In this case you can use an Email Template or write a custom message to send.
